
We have been working with a client for the past few months on a very interesting and challenging project. The full scope is confidential, but I thought it worth sharing some of the technical work we have been doing with Mininet, its fork, Containernet, and one of its support packages, libvirt to produce a synthetic training environment.
Mininet creates a realistic virtual network, running real kernel, switch, and application code, on a single machine, Containernet extents this capability to allow the use of Docker containers in the Mininet network, and to allow fully fledged virtual machines to be hosted in the environment libvirt is used. Sounds easy, right – sadly not quite so, whilst Mininet is very much a live project, with version 2.3.0 being released in February 2021 and bug fixes and updates being regularly released, and Containernet also being patched and generally being aligned with the Mininet project, the libvirt support has not been updated since March 2018 and is described by the project as ‘an experimental feature’.
Hosting Environment
I used Ubuntu 20.04.4 LTS (Focal Fossa) for the virtualised host for the training environment, this is where the first departure from my normal way of working arises. I am very much a fan of VMWare, but it does have its limitations, that is Workstation Pro, my usual hypervisor, does not support nested virtualisation, so I had to use Microsoft’s Hyper-V platform, and then enable nested virtualisation:
- Create a virtual machine.
- While the virtual machine is in the OFF state, run the following command on the physical Hyper-V host. This enables nested virtualization for the virtual machine.

- Start the VM, install cpu-checker and verify that KVM acceleration can be used:
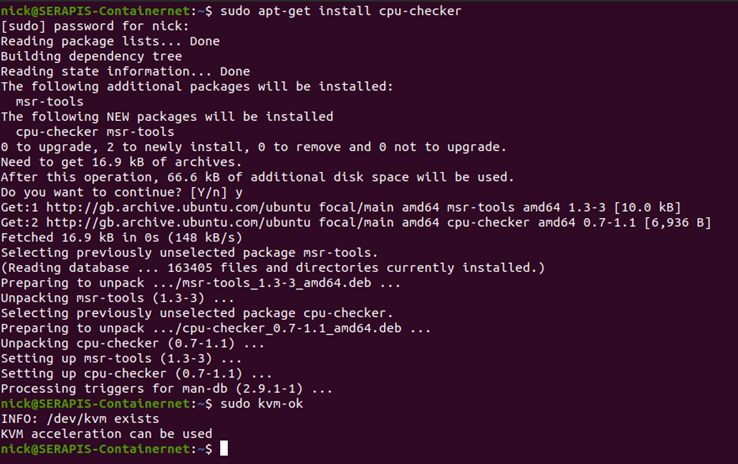
This then allows me to run Docker containers and virtual machines within my virtualised host.
Containernet
I initially installed Mininet, gained some experience with that application and then installed Containernet using Option 1: Bare-metal installation, which uses Ansible, this is an opportunity to share some knowledge. When installing Containernet it assumes that this is a bare metal installation, and you will get a fatal error:
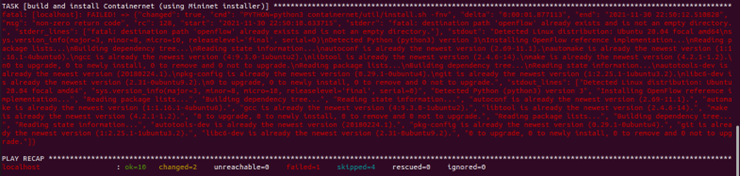
This is because as you have already installed OpenFlow as part of Mininet. There are 2 options really – remove the existing installation of OpenFlow, which is a bit extreme, or have a proper read of the error and work out that it relates to the switches for install.sh (containernet/util/install.sh -fnv) it is the -f switch that installs OpenFlow, so change the step in the ansible yaml file (containernet/ansible/install.yaml) and remove the -f leaving -nv and it will now install cleanly.
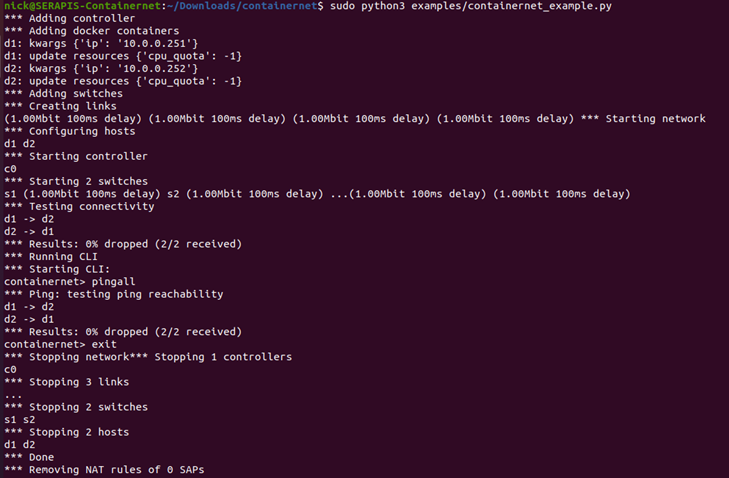
Once Containernet is installed run the containernet example to check everything is working:
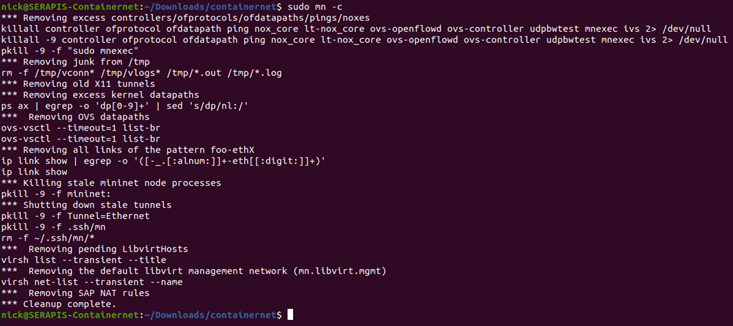
Then ALWAYS make sure you clean up the environment:
Test VM
To confirm that we can do the virtualisation with this version of our environment, we are going to build the example Ubuntu guest as described in the libvirt support document for Containernet before we install the libvirt support.
What we know is the ubuntu-vm-builder is NOT supported in 20.04, which is our host, so let’s just download the 20.04 iso, and then configure as per the reference example:
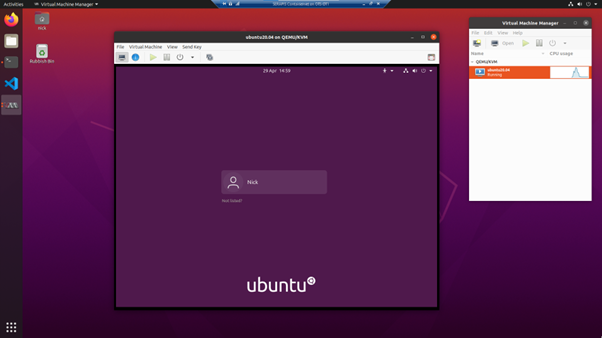
Download the 20.04 Ubuntu Desktop iso and create a new VM in Virtual Machine Manager – 2 CPU’s, 4096MB of memory and 10GB drive
When configuring the installation – Minimal Installation – this is a PoC
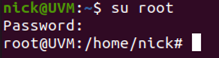
We need to set the password for root, and check that we can log in as root using our new password:
OK, so we have a running VM in our Ubuntu development environment, configured in line with the reference material:
libvirt Support
The more observant will have noted that we are using Python3, that’s because current versions of Mininet and Containernet have moved from Python2 to Python3. Unfortunately this is not the case with the libvirt support libraries, and this is where we start to have to do some interesting code modifications.
To get libvirt working the information provided indicates we need the following packages:
qemu-kvm libvirt-bin libvirt-dev python-paramiko python-libvirt
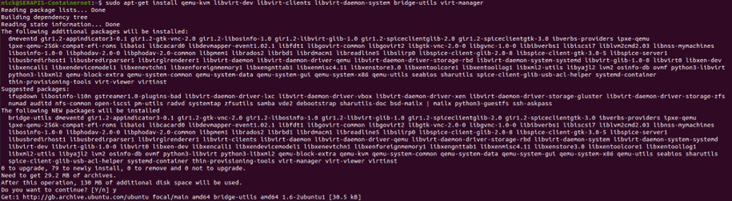
however remember the documentation was written in 2018, and a lot has changed since then, so to get KVM working on Ubuntu I followed the guidance from LinuxConfig.org, the TL;DR is install:
qemu-kvm libvirt-dev libvirt-clients libvirt-daemon-system bridge-utils virt-manager
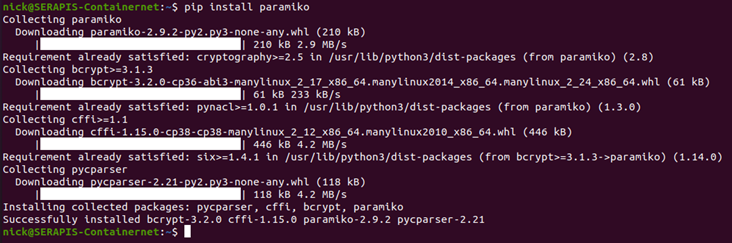
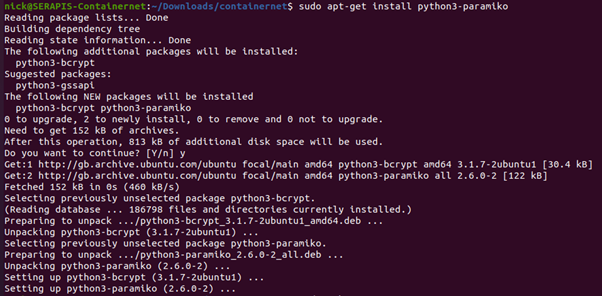
This left paramiko, which is a Python implementation of the SSH protocol and is used by the libvirt support to make changes to the configuration of the VM’s used in Containernet to set up networking etc. I simply followed the installation guidelines from the project:
Now we need to install the libvirt support into Containernet, which is a non-trivial exercise. As we have a running installation of Containernet we can install quite easily – according to the guide:

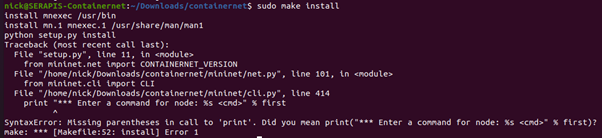
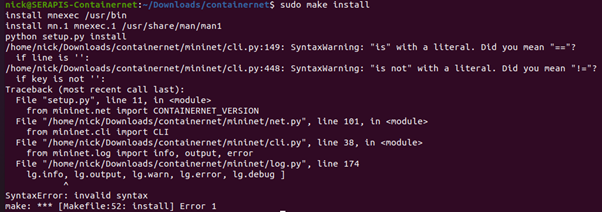
then make install:
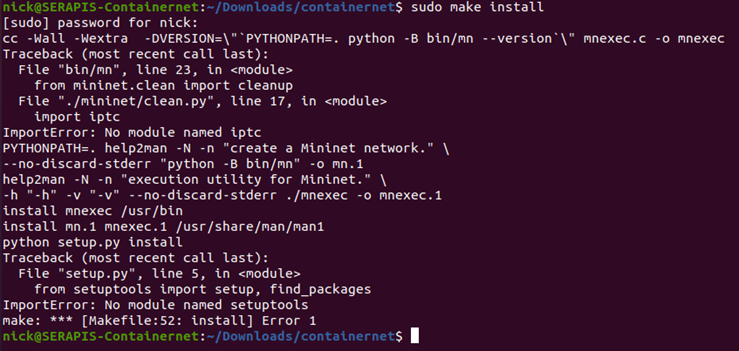
No module named setuptools – really?

So setuptools is installed in Python3, but not for Python2 – we need to migrate the libvirt support to Python3, as that is what Containernet is using, this is going to hurt!!
First thing is to install python-is-python3:
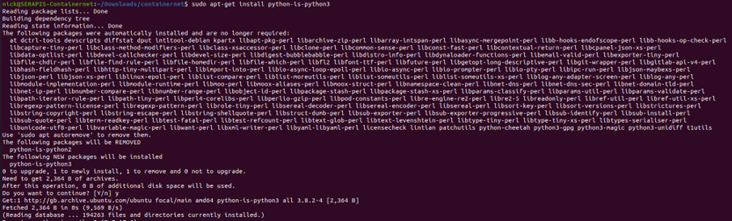
Now try to install again:
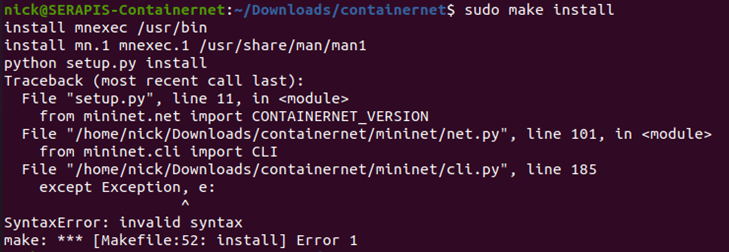
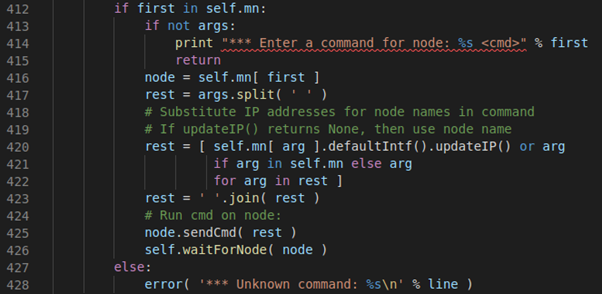
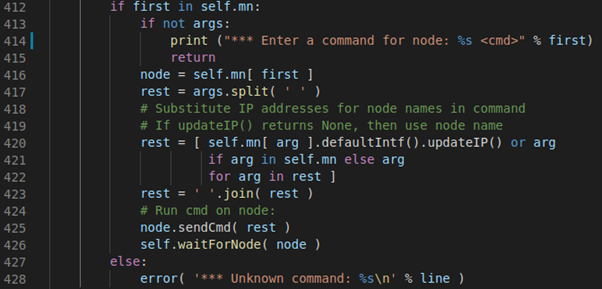
And now we have syntax errors because of the differences in the way Python2 and Python3 are structured – work your way through these, it’s a long and iterative process, and below are some examples of the things you will need to fix:
Change to:
Next error:
Change to:
Next error:
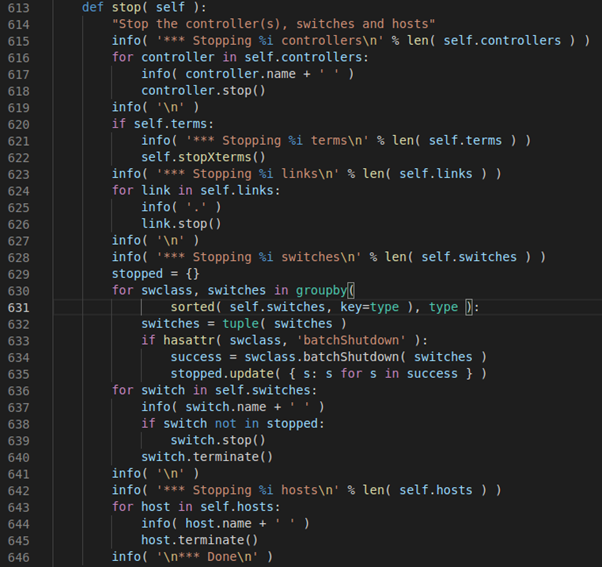
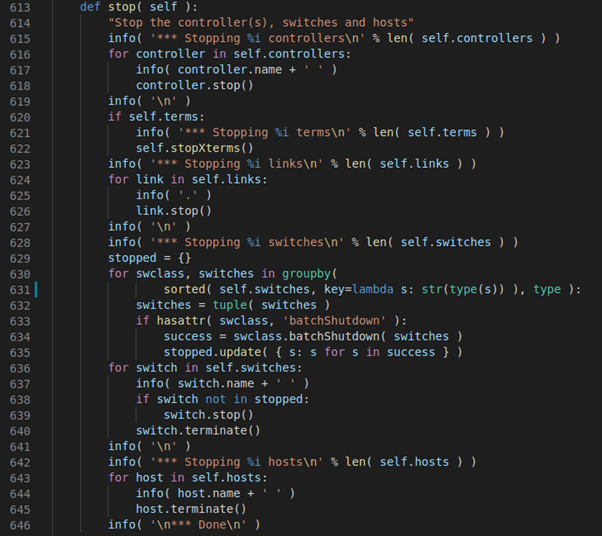
Note this time we have 2 warnings AND an error, the warnings are simple syntax warnings, but lets look at the error, when we look at the code in our project:
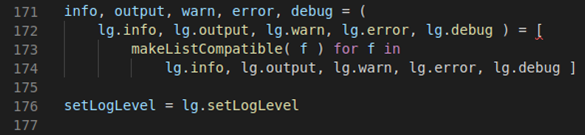
It is very different from the code in our original mininet installation pre-libvirt:
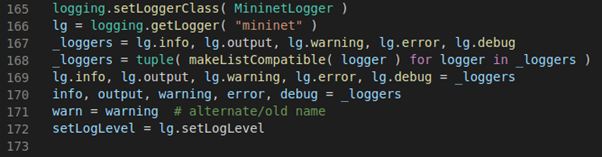
This will be because the libvirt changes relate to Mininet code from over 5 years previous, and a lot has changed, so do a hump and dump from the original to the new, this is a situation that happens a lot, and you need to work out what the old libvirt code does and then compare and blend with the far newer Mininet and Containernet code.
When we have solved all the compile errors its time to run the previously successful containernet_example.py script to see if Containernet works before we confuse matters with a VM – we have the inevitable run errors:
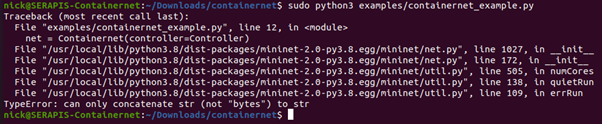
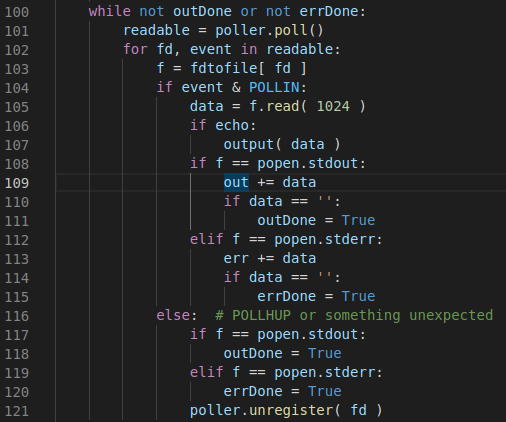
Change to:
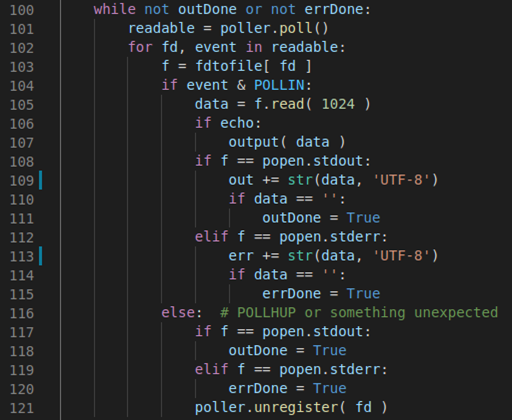
Note that we fix both line 109 and 113.
This run, break, fix sequence is all down to the differences between Python2 and Python3, with much of it being repetitive as it progresses through the running process.

So we can revisit our simple test:
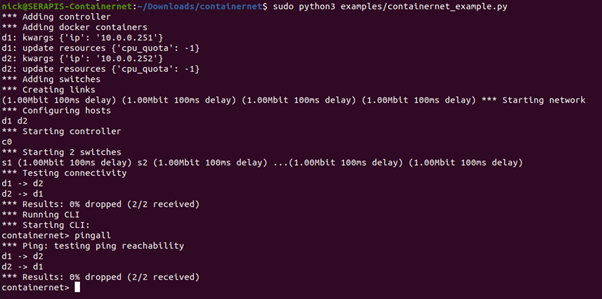
and after much modification, it works, but of course it breaks when we exit:
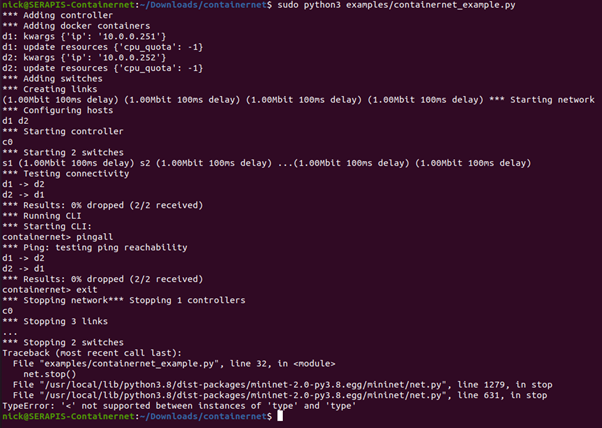
Change to:
And it now works – well the Mininet and Containernet elements do:

Then ALWAYS make sure you clean up the environment:

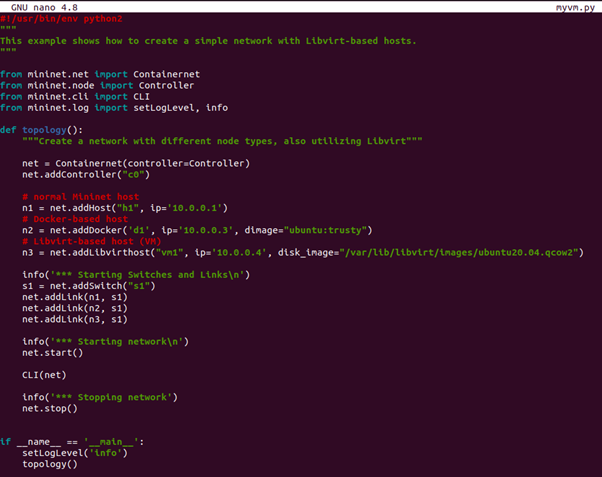
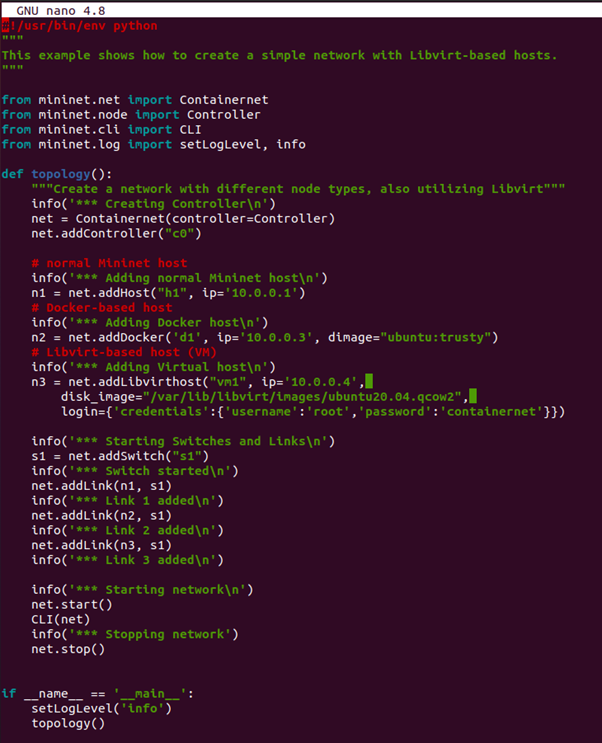
So it’s time to add a VM to the mix, we have a simple script to give ourselves 1 Mininet instance, one Docker instance, and one VM:
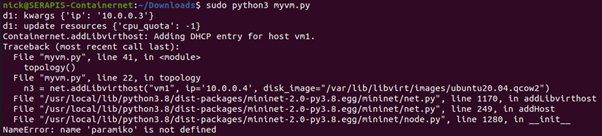
Oh for goodness sake – I thought this was addressed in earlier when we installed libvirt, but obviously not, and the reason is it was installed for Python2 and we are working in Python3 now, so we need to install for Python3:
This works – just remember to do sudo make install afterwards
Progress is being made – a different failure than we have seen previously
And when we run the cleanup code it does a good job on the VM – so here is the question, an ssh error – have we tried to ssh onto the VM – no – let’s try that

Of course, its Ubuntu, which means we need to allow root to ssh onto the unit, so in the VM edit the sshd_config file found in /etc/ssh/sshd_config and add the line:
PermitRootLogin yes
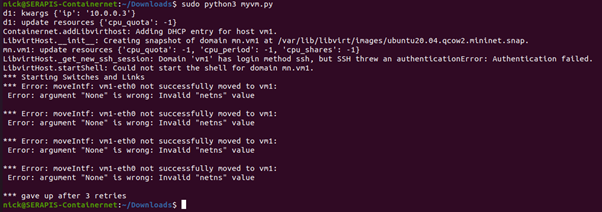
And then shutdown the VM and try our script again, but add the credentials information:
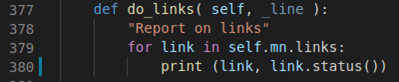
Well we have at least made a VM part of our network – which is the furthest we have ever been:
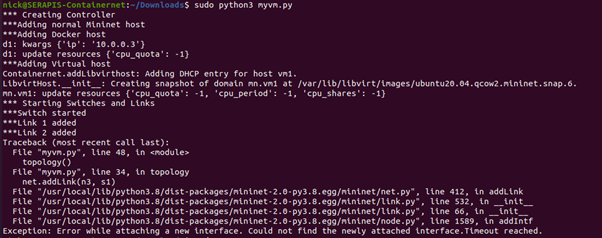
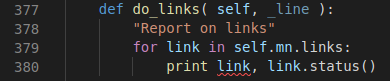
As expected – the error is related to the adding of Link 3 – which is going to be part of the scripting within libvirt, when we fix the scripts and potentially add support for Windows based VM’s through libvirt, but that’s a job for another day.